DIAGNOSTICS:
1- Power Data/Compliance Diagnostic (ECM parameters must be available within 1 minute of powering the vehicle’s engine on)
Resolution: Make sure you are connected to the ECM device. On the menu, go to Scan Devices and select your ECM device. Make sure all engine parameters pass the diagnostics (all green)
2- Engine Synchronization Data Diagnostic (not all ECM parameters are available when the ELD records an event e.g. duty status change)
Resolution: Make sure you are connected to the ECM device. On the menu, go to Scan Devices and select your ECM device. Make sure the diagnostic passes all engine parameters (all green)
3- Missing Required Data Elements Data Diagnostic (other required data e.g. location, coordinates) not available when recording an event
Resolution: Make sure the GPS module is enabled on your ELD
4- Unidentified Driving Records Data Diagnostic (more than 30 minutes of driving without a driver logged on the ELD)
Resolution: You are not logged on the ELD and the vehicle moves for an extended period of time. Please login and select your Driving time
5- Timing Compliance Diagnostic
Resolution: Go to Settings on your mobile smart device and make sure Date/Time is set to automatic and synchronized with the network.
6- Positioning Compliance Diagnostic
Resolution: Make sure your mobile smart device has location services enabled and you are connected to the ECM device.
MALFUNCTIONS (most malfunctions relate to a Diagnostic, but a malfunction is generated when the same diagnostic occurs for at least 30 minutes in the last 24 hours):
P- Power Compliance (related to diagnostic 1)
E- Engine Synchronization Compliance (related to diagnostic 2, for instance multiple periods of no ECM data that, when added together are more than 30 minutes in the last 24 hours)
T- Timing Compliance (the time on the ELD, compared to an external time source are different)
Resolution: Make sure the date and time on your mobile device is properly set. DO NOT (manually) change the date or the time on your ELD
L- Positioning Compliance (no location available, (related to diagnostic 1)
R- Data Recording Compliance (monitor storage capability to store records)
Resolution: Make sure you have sufficient internal storage on your ELD. Delete files if necessary
S- Data Transfer Compliance (ELD records not able to be uploaded)
Resolution: You probably don’t have internet access. Restart the ELD (if needed) and confirm you reconnect to the network
The following export methods are supported:
USA
Option1—Telematics using Wireless Web services
Option2—Local using both: USB2 and Bluetooth.
To submit the Output File to an authorized safety official, the driver selects the “Export ELD Data File” from the Logbook screen. The driver, then, will select one of the following methods:
– Agent External Storage: The ELD will first verify the external storage device is compatible with FMCSA specifications by validating the contents of file “ELDUSBTX.TXT”. After positive validation the ELD will save the data file on the FMCSA-provided external storage device.
– Bluetooth Transfer: After selecting this option, the authorized safety official will pair and verify PIN with the driver. Once the Bluetooth devices are paired, the safety official’s technology equipment will transfer the output file to the FMCSA website using Web services.
– FMCSA web service: This option securely communicates to FMCSA’s end-point ad obtains submission ID.
NOTE: An email share option is also available for drivers to share Print/Display logs and ELD Data File by sending an email to any destination.
Canada
The ELD must be connected to the ECM and reading engine data in order to export the output file. If engine data is not available, you will see a notification indicating ECM connection is missing:
There are two different ways to export the output file, you can share (tap on SHARE) the output file with a third party or you and email the output file to a government agency. In both cases, enter the file comment provided by the roadside inspector and tap on AGENT.

Read this chapter before operating the ELD!
Confirm you have received all required component, make sure your account was created and you have access to the ELD online portal.
To save time in the future, we recommend you print a copy of this document and keep it inside the cab. This document contains critical information to properly operate your ELD and a list of malfunctions and how to resolve them. It is also recommended to write down your ECM device’s identifier (shown below) on a separate location in case you lose this document.
In some instances,this manual uses Icon Keys to direct your attention to specific and important information. See the different icons on the left.
What you need before operating the ELD?

Your mobile device (where the ELD app is running) must a) have Bluetooth enabled and b) be connected to the internet either with a cellular data plan or connected to a hot spot.
Installing the ECM device:
Please plug the ECM deviceto the vehicle’s diagnostic port. In some cases, you might need to use the ECM adapter to plug the device on J1939 port.
Locate the diagnostic port (see image below for possible locations depending on vehicle’s make, model and year).
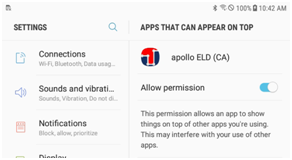
For the ELD to remain compliant, it must remain connected to the ECM deviceand read engine data. Engine data is only available when the vehicle’s engine is turned on.

The initial configuration is only required right after installing the ELD app for the first time and it is no longer needed after. The objective is to initially configure a vehicle profile (tractor number, VIN number) and connect/test the ECM device connection.


 To connect to the ECM device, tap on Scan Devices, wait for the device to show up (make sure the correct ECM ID shows up)


The ELD has three different accounts:
Driver: Unique, per-driver account used by drivers Hours of Service and ELD regulations. This account records duty status changes (RODS) and allows the export of driver’s records for printout, display and agent output file generation.
Support: Account used by the carrier and ELD manufacturer to setup, configure, update and troubleshoot the ELD. No duty status changes are recorded with this account and no access to driver’s record of duty status changes is permitted under the support account.
Non-authenticated: All operation of a commercial motor vehicle (CMV) is recorded under this account (a.k.a Unidentified Driver) if no driver has logged into the ELD. Non-authenticated records (vehicle movement and on-duty time) are stored on the ELD as well as the carrier and should be assumed by a driver account.
Login using your driver’s credentials. Login IDs, and the driver’s license associated with the login ID, cannot be duplicated and are unique in the ELD system.
The driver is restricted to be logged on to only one ELD at any time. In order for the driver to logon on a different mobile device, the driver must change to off duty status and logout from the previous device.
Driver’s unlock. In an event the driver is still logged on aELD, but the device ceased to function or gets lost, the driver must call the home base carrier and ask for his login name to be unlocked. The unlock process will change the driver’s status to off duty at the time the driver solicited the login unlock.
Before driver’s logs can be exported and shared with an authorized agent, the driver must update the correct vehicle information. Please tap on the truck or trailerimage to pick from the asset list downloadedduring the login (see list below) or to manually enter (if allowed) a new truck or trailer.Once you select a tractor or trailer from thedownloaded list the ELD will always use theVIN number, license plate and registration state displayed on the list.

Important: Enter your vehicle’s dashboard’s odometervalue (twice) in order for the ELD to adjust discrepancies between the dashboard and engine odometer.
Make tractor and trailer selection

You can also add a new tractor or trailer (if allowed by your carrier) by selecting the + button located on the top right of the screen:
Once a new assetis created on the ELD, the asset information is broadcasted to the ELD portal and other ELDs operating under the same carrier.
To connect to the ECM device, tap on Scan Devices, wait for the device to show up (make sure the correct ECM ID shows up)

Some ELD configurations lock an ELD to a specific ECM device, in which case, the Scan Devices screen is not shown and the ELD will automatically run the diagnostic.
Once connected to the ECM device you can run an ELD diagnostics (accessible from the top-right menu). The diagnostic checks critical components on your ELD and all areas must pass the test in order for you to remain complaint.
Bluetooth and ECM connection status: The ELD must be able to read engine data at all times. Make sure the Bluetooth and ECM connection indicators remain green. If the indicator turns red, please go to Scan Devices and connect to the ECM-linked device.

We recommend verifying the driver’s profile. Please make sure the information is correct: carrier name, your rule set (60-hour or 70-hour) and the home base time zone.Select the ruleset drop-down to change rule set from 60h to 70h and vice versa.Select the units of measurement (miles,gallons, kilometers or liters). Starting 24h time is set by your carrier butcould be changed at any time. Just keep inmind that the new 24h starting time will takeeffect on your next cycle (after the 36h restart).

As a driver, current regulations allow up to 75 Km of driving for personal use. This provision allows you to, for instance, drive to the nearest rest area, drive home among other reasons. The ELD will prompt you to add a pre-defined remark or type a different reason.
Once you have reached the 75 Km limit you will receive a notification and you will be automatically switched to Driving duty status:
If the ELD shuts down (e.g. power loss) or restarted, you will be prompted to either exit or continue the Personal Use status:

The ELD also allows you to drive the vehicle inside a yard. Please, switch to Yard Move (YM button) before putting the vehicle in motion. If the vehicle’s speed exceeds 32 Km/h you will be switched (automatically) to Driving duty status.
Same as Personal Use, if the ELD is restarted, you will be prompted to either remain in the Yard Move status or exit such a status.


 If you would like to defer time to the next day use the slider to select how much time you would like to defer:
 Once you select how much time you want to defer, you will need to confirm:
 For the current and the next day, your main ELD screen will show information regarding you deferred time and when OFF-Duty time is fully taken in order to remain compliant with Hours-of-Service regulations:


Every duty status change must be certified before exporting the driver’s logs. Select the “Certify Logs” option from the menu to list all unverified logs. Select each day and tap on the “Certify” button. At the end of each 24-hour period, the ELD will automatically prompt the driver to certify logs for the last 24 hours period. During the driver login and logout, the driver will be prompted to certify the logs.

You can also certify your logs at any time by going to the main menu and selecting Certify Logs. Select the day or days you would like to certify:

Select the 24-hour period you want to certify then tap on the CERTIFY button. You need to agree to the statement.
To view your Logbook, edit your logs or export Logs/ELD data file, go to the “Logbook” option in the menu.

You can move to a different day by selecting the left and right arrows:
The Logbook tab shows the logbook for the selected day and the Logs tab has a list with all the logs for that day, where you can edit an existing log. You can use the mobile device’s swipe option to move between the Logbook and the Logs tabs:

Adding, deleting and editing an existing record (log): On the LOGS tab select the edit icon. Make the necessary changes, input the mandatory remark explaining the reason of the change and then Confirm Changes. Remember, driving time can only be increased, on automatically recorded records; and deleted, reduced or increased on manually recorded records! Your ELD must be synchronized to your tractor’s ECU (via ECM device). Failure to read engine values will make you non-compliant.
Daily ON-DUTY, cycle ON-DUTY and possible violations will be calculated according to the new record change.

During the login process, you will be prompted to review the existing unidentified logs.
If the unidentified logs do not belong to you, just tap on SKIP. If some, or all, unidentified logs belong to you select REVIEW LOGS, select the checkbox associated to the logs that belong to you and assume the logs. The carrier can later revert those logs back to the unidentified if needed for which you will be asked to confirm.
For time to time, the carrier you work with may suggest some changes to your logs. You are responsible for assuming or rejecting those suggestions.
Carrier-proposed edits will show on your ELD at different times. They will show during login and logout process and they will also be shown as a new ELD message on the main screen:

Carrier-proposed log edits are shown during the login, logout and in the message inbox (see image above).
Please make sure:
Once you tap on the ELD message button a list of carrier-proposed log changes will be shown:
You can go to the menu and select Logbook or enter Roadside Inspection mode. This is a single step process. Enter the file comment provider by the roadside inspector and tap on PRINT-DISPLAY LOGS
The following export methods are supported:
USA
Option1—Telematics using Wireless Web services
Option2—Local using both: USB2 and Bluetooth.
To submit the Output File to an authorized safety official, the driver selects the “Export ELD Data File” from the Logbook screen. The driver, then, will select one of the following methods:
– Agent External Storage: The ELD will first verify the external storage device is compatible with FMCSA specifications by validating the contents of file “ELDUSBTX.TXT”. After positive validation the ELD will save the data file on the FMCSA-provided external storage device.
– Bluetooth Transfer: After selecting this option, the authorized safety official will pair and verify PIN with the driver. Once the Bluetooth devices are paired, the safety official’s technology equipment will transfer the output file to the FMCSA website using Web services.
– FMCSA web service: This option securely communicates to FMCSA’s end-point ad obtains submission ID.
NOTE: An email share option is also available for drivers to share Print/Display logs and ELD Data File by sending an email to any destination.
Canada
The ELD must be connected to the ECM and reading engine data in order to export the output file. If engine data is not available, you will see a notification indicating ECM connection is missing:
Some notifications are shown while operating the ELD. Some of them are errors, warnings or just specific information regarding an operational change. These are the most common notifications:
During authentication:
Unidentified Driving: Once the vehicle, to which the ELD is connected to, begins moving a Driving event is created. The ELD will show a visual and audible notification indicating the driver to stop and authenticate on the ELD. The driver could continue to the destination, authenticate later on and review/accept unidentified events.
Logs Certification: At the beginning of every 24-hour period, the ELD shows a notification to the driver asking to certify the logs for the previous day or past days. You can select not to certify your logs (yet), certify the previous 24-hour period or all pending logs.
Once you are ready to certify your logs, please agree to the following statement:
Automatic Driving status with multiple drivers authenticated: If the vehicle moves, there is more than one driver authenticated on the ELD and no driver is on Driving duty status; the ELD shows an audible and visual notification prompting drivers to select the driver currently operating the vehicle.
Carrier-proposed log edits: If the carrier’s back-office personnel propose a change to the driver’s logs, a notification is shown on the ELD. The driver can assume or reject the carrier-proposed edits during login, logout or by taping on the new message icon.
Notification of carrier-proposed edits during normal ELD operation:
DIAGNOSTICS:
1- Power Data/Compliance Diagnostic (ECM parameters must be available within 1 minute of powering the vehicle’s engine on)
Resolution: Make sure you are connected to the ECM device. On the menu, go to Scan Devices and select your ECM device. Make sure all engine parameters pass the diagnostics (all green)
2- Engine Synchronization Data Diagnostic (not all ECM parameters are available when the ELD records an event e.g. duty status change)
Resolution: Make sure you are connected to the ECM device. On the menu, go to Scan Devices and select your ECM device. Make sure the diagnostic passes all engine parameters (all green)
3- Missing Required Data Elements Data Diagnostic (other required data e.g. location, coordinates) not available when recording an event
Resolution: Make sure the GPS module is enabled on your ELD
4- Unidentified Driving Records Data Diagnostic (more than 30 minutes of driving without a driver logged on the ELD)
Resolution: You are not logged on the ELD and the vehicle moves for an extended period of time. Please login and select your Driving time
5- Timing Compliance Diagnostic
Resolution: Go to Settings on your mobile smart device and make sure Date/Time is set to automatic and synchronized with the network.
6- Positioning Compliance Diagnostic
Resolution: Make sure your mobile smart device has location services enabled and you are connected to the ECM device.
MALFUNCTIONS (most malfunctions relate to a Diagnostic, but a malfunction is generated when the same diagnostic occurs for at least 30 minutes in the last 24 hours):
P- Power Compliance (related to diagnostic 1)
E- Engine Synchronization Compliance (related to diagnostic 2, for instance multiple periods of no ECM data that, when added together are more than 30 minutes in the last 24 hours)
T- Timing Compliance (the time on the ELD, compared to an external time source are different)
Resolution: Make sure the date and time on your mobile device is properly set. DO NOT (manually) change the date or the time on your ELD
L- Positioning Compliance (no location available, (related to diagnostic 1)
R- Data Recording Compliance (monitor storage capability to store records)
Resolution: Make sure you have sufficient internal storage on your ELD. Delete files if necessary
S- Data Transfer Compliance (ELD records not able to be uploaded)
Resolution: You probably don’t have internet access. Restart the ELD (if needed) and confirm you reconnect to the network
Select the DVIR button on the main screen. The tap on the + button (bottom of screen) to select the applicable region (USA, Canada Schedule 1 or CanadaQuebec). Additional options are available for Quebec compliance: heavy vehicle, bus and motor coach.
A compliant checklist is shown. Select any defect you might have found during your vehicle and trailer inspections. On the last step enter a remark and indicate if the defects were corrected or not.

Select the item with defects and tap on NEXT.

We have separated items under the C-TPAT 17 agreement in order to help you reduce border delays (if applicable) and minimize risks.
Check all. Minor and major, defects accordingly. Take pictures of defects which are uploaded to the ELD portal and could be shared later on.
On the last step, enter the remark and sign the inspection report:

If defects were found and corrected, you can ask the mechanic for a signature. There is a third, optional signature which some carriers require before a vehicle leaves the yard.
You can take up to 9 different pictures. Once you are done select Upload.
Addressing two of the biggest complains from drivers using an ELD
The new Shipment Sync feature, implemented on app release 133, targets those specific needs by allowing drivers, motor carriers, brokers, shippers and receivers to be connected and sharing shipment information in real-time. Shippers and receivers can confirm exact arrival time, bay number assigned to the driver, safe parking instructions and additional notes. This information is shared (instantly) with drivers, allowing them to better plan their routes, rest times and minimize dock waiting time. The next page shows a general overview of Shipment Sync:

First you need to create the shipment (see image above). Once the shipment is uploaded to the ELD portal, the carrier can share the shipment with brokers, shipper and receiver.
On the new Shipments tab (online portal), motor carrier personnel can see all shipments created by drivers. A pop-up window is displayed once the Details link is clicked. The motor carrier can share these ETAs with the broker and pickup/delivery warehouses. To do so, the motor carrier just needs to input the email address of every entity they want to share the shipment information with and save the shipment.

Once the shipment is saved on the ELD portal an email (from domain: shipment-sync.com) is sent to each destination. Shippers and receivers (independently) can input the specific warehouse arrival, bay number, safe parking information and additional notes. Information about the motor carrier, driver’s first and last name, shipping document, last known location is shown on the left pane. The last know location is updated every time the page is loaded.

Once the shipment information is saved, an instant notification is sent to the driver including all the details added by the pickup/delivery personnel, keeping the driver updated at all times.